
Thanks for stopping by.

 Although I have already used the "Peace" stamp from Clarity Stamps I hadn't had a chance to use the Noel Stamp I got in the same order. So - elegance - I suppose it is up to each person to decide what is elegant to them but I hope I have achieved it in this card. I started off stamping the word with Versamark onto white card and embossing in silver. From a sheet of handmade paper in my stash I then cut out four ovals that would fit inside the O of Noel. I then folded them in half and stuck each half to the next one to make a sort of paper bauble effect. This was then stuck on top of the letter.
  I don't have many humorous Christmas stamps so decided to use my digistamp "Mistletoe Kisses" from Prairie Fairy as she just makes me giggle every time I look at her. She's coloured in ProMarkers and I have added Diamond Glaze to her glasses, white Flower Soft for her bobble and edges of the jacket, Glamour Dust on the edge of her hat and pearls for the mistletoe berries.
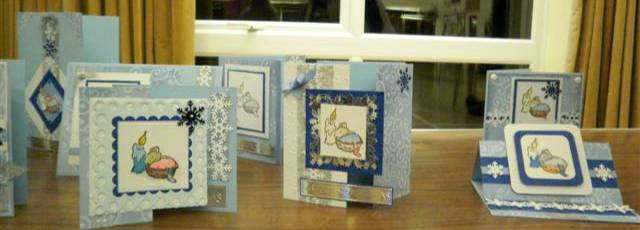
 We had our club night last night and one of the projects was a "shoebox challenge" where we give the girls bags of exactly the same items and they have to make up a card using some of everything in the bag but can also add any embellishments, colours, glitters etc of their own. We are always amazed at how different the cards turn out. These are just a few of them.
 As I've been a bit pushed for time and I also have things to do for our monthly craft club on Friday I decided to make one card fit two challenges. Over at Bah Humbug their challenge is "cuties" and over at Die Cut Dreams their challenge was a recipe of using 3 papers, 2 embelli's and 1 hand coloured image. I have used a LOTV stamp and coloured using ProMarkers. Her wings and the berries in her hair are Stickles. All the papers came from the My Mind's Eye Christmas Glitter Book. I've used nesties to die cut the image and two of the papers and then inked the edges. The sentiment is computer generated and I've added a ribbon and a flower as the embellishments.
 I started off using a new stamp I bought at Exeter the other week - it's called NO-EL by Hobby Art and I loved the polar bears and penguins on it. Stamped with Memento and coloured using ProMarkers. I then took some double sided adhesive sheet, cut to size, placed over the image. I then took the top layer off and sprinkled with Glamour Dust. I then layered onto black and red mirri card. The card base is a DL covered in paper from my PM Classic Christmas set. I punched the long edge using Martha Stewart's raindrop edge punch (which I thought looked a little bit like Christmas lights) and added some red card underneath. A piece of red card and the patterned paper were placed underneath the main image. I used some red and white dotty ribbon and then punched out some flower layers from red and black card using SU punches and used a pin from Posh Pins & Charms to attach them. The pin started off with black beads and a pearl inbetween but as I wanted red I thought I'd try colouring it with ProMarkers and it worked brilliantly. The sentiment is computer generated (I could just imagine the polar bear on the right of the image saying this in a very gruff voice!!! lol) and matted using SU punches. The last thing I did was to put a strip of red liner tape down the right hand side of the card and sprinkle it with Glamour Dust.
 I have got some Trinitage sheets by La Pashe which I bought from Imag-e-nation a while ago. They are called Trinitage as apart from the decoupage on the front of the card there are three distinct layers inside the card - so a "Trinity of Decoupage" became Trinitage.
 I cut a 14cmx14cm card and covered the front with paper from PM Contemporary Christmas paper pack. The smaller decoupage was matted and layered onto the front of the card with some ribbon and punched snowflakes. The sentiment was computer generated and layered using SU punches.


 After my great summer school doing stained glass I went for another day with the same tutor at his studio as I wanted to try fusing glass. This was to be the present for Val & Jim and I ended up making them a large fluted bowl and two matching candlestick holders. It was great fun and I think I will certainly be doing more glass work - also it makes a really unique present.
 Talking about the stained glass summer school here is a photo of the main piece I made. It's an art deco tree of life lamp.