Followers

Thursday, 18 November 2010

Snowflakes and Shades of Lilac

The challenge over at Die Cut Dreams this week is Snowflakes and over at Bah Humbug! their challenge is Shades of lilac so I guess this card fits them both............

I have used one of the cute squares from LOTV which has been "blinged" with Glamour Dust and mounted on a nestie.  The snowflake backing paper is from my stash and punched with a Martha Stewart Around the Page set and then mounted on silver mirri.  The sentiment is a digistamp from Sentiments 4 You which has been printed out and then die cut and mounted on nesties.  I've added some pearls to the sentiment and then punched out some snowflakes (Martha Stewart) and added pearls to them.

Thanks for looking.

Tuesday, 16 November 2010

Rudolph

The challenge this week over at Bah Humbug is Reindeers (though I suspect they will all want to see Rudolph.....).  I have used a digistamp from Digital Delights by Loubyloo - a great looking Rudolph if ever I saw one.

I have glittered his antlers and put Diamond Glaze on his nose and eyes.  The backing paper is from My Mind's Eye Christmas Glitter stack and I have used ribbon which I have just bought from the Sincerely Yours show in Taunton on Sunday.  Paper flower and brad from stash also glittered.  The sentiment is also from Digital Delights.

Thanks for stopping by.

Tuesday, 9 November 2010

Die Cut Dreams "Christmas Crackers"

This weeks challenge over at Die Cut Dreams is Christmas crackers.  I didn't have a stamp that would work for this challenge so went on a trawl of the internet and came up with this lovely old advert for Tom Smith's Christmas Crackers.

I printed it out on matt photo paper and layered it up onto green and bronze mirri which had been punched down the right hand edge with a Martha Stewart punch.  I tied a bronze ribbon around and added a computer generated sentiment matted onto Stampin Up punched layers.  The backing paper is from my stash and I added some gems.

Thanks for looking.

Monday, 8 November 2010

Bah Humbug Fancy Folds

Well, I'm not sure if this comes under the heading of fancy folds but I'll enter it into the Bah Humbug challenge this week and see what happens!!!

This is basically a slider card and I have taken red cardstock and made an open ended envelope with it, decorated the front with a Clarity Stamp sentiment mounted onto nesties.  I have watermarked the background using a Stampin Up set of snowflakes and punched gold mirri with a Martha Stewart snowflake punch.  I then made  up a card to fit inside the slider and used the SU snowflakes to watermark the card and gold embossed a snowflake onto nesties.  A red polka dot ribbon was tied around the card and gold mirri punched snowflakes with gems added.  To make the slider work you insert more ribbon into the centre of the envelope and slide in your card to the bottom.  Then tie the ribbon in a bow at the side and to open you just pull the ribbon and the card slides out.


Thanks for looking.

Sunday, 7 November 2010

Special card for a special person.......................

Sorry for not posting much over the last couple of weeks but we have been up to our eyes in decorating and moving rooms round; principally my craft room which started out as a bedroom.......... I had gradually taken over until there was just a sofabed and double wardrobe in it.  We decided to move these out and my lovely hubby then put in units, worktops, shelving, electrics and towel rails for all my punches - what a sweetheart.  Anyway this has caused so much chaos that I've been tripping over boxes and bags for the last two weeks plus I'm getting ready for our Christmas Craft Fayre which is taking place on Friday 12th November from 7pm til 9pm (wine and nibbles included!!! lol) at Sparkford Village Hall.

Anyway it's Tony's birthday on Tuesday so I have made this card for him using an image from the Thomas Kinkade CD from Joanna Sheen.  He loves watermills so I thought he would like this.  It's straight forward decoupage but the last layer which is the water has been printed onto silver inkjet film which makes it look wet - not sure if the photo does it justice on this.  It's mounted on an 8" x 8" card and I have used a deep edger punch from Martha Stewart and some gems.  The sentiment was included with the decoupage sheets.

Thanks for stopping by.

Monday, 1 November 2010

Presents and digistamps

The challenge over at Bah Humbug this week is "presents" and at Die Cut Dreams it is "digistamps".  As I am still in a total shambles in my craft room I am going to combine both challenges in one card............ luckily the digistamps are in my computer and I just about know where that is!!!  lol

I have used this cute image of a girl sitting on a heap of presents in a Christmas bauble which is from Cuddly Buddly.  I printed it out a couple of times to get the correct size for my nesties and then coloured with ProMarkers.  On the ribbons and bows I used Stickles.  The backing paper is from the Papermania Classic Christmas set and I added some red lace to the top of the bauble and across the card.  The red roses are a die cut from Little Claire and the leaves are an L-Em punch.  The ticket is also a digistamp from Cuddly Buddly.  The snowflake is Martha Stewart with a gem in the centre.

Thanks for looking.

Tuesday, 26 October 2010

Anniversary Card

Just a quick post today as my craft room looks like a bomb's hit it!!!  Nothing unusual there............. but we have just recently taken a sofabed and double wardrobe out of the room and my super OH is installing units and worktops for me.  Trouble is you know the phrase "it gets worse before it gets better"?????  It's definitely true!  I can't move for tripping over things so am dying to get it finished so I can start putting everything away.  I'm even going to have room to put up my sewing machine and embellisher - they are going to have their own separate section - I won't know myself.

It's our wedding anniversary tomorrow so had to make a special effort as Tony is doing all this work - plus we've been married for 20 years........ unbelievable!  I had the smaller front piece of the card hanging around in one of my boxes for ages - it was done at a Stampin Up evening - but wasn't really "me" - so though I would alter it a bit.  I cut the front part of the card off first and then matted it onto an A5 red base card which had been covered with some pearlescent paper, which had been printed out with hearts and the word love, and some silver mirri which I'd put through my Big Shot in a Crafts Too embossing folder.  I added some matching ribbon across the centre and punched out a border from red cardstock using my Martha Stewart heart border punch and added some ribbon across.  The sentiment is computer generated.  Lastly I added some red roses and a red & pearl pin from my stash and punched out some fern leaves.  Hope he likes it!

Thanks for stopping by.

Sunday, 24 October 2010

The One I Love

This week's challenge over at Die Cut Dreams is "The One I Love".  I decided to use a digistamp and sentiment from Pollycraft which were both freebies.

I printed out the lovely penguins and sentiment on supersmooth white cardstock and the image was die cut, matted and layered using nesties.  I coloured the penguins with ProMarkers and added Diamond Sparkles for the snow and Arctic White Flowersoft on their hats.  The backing paper is from a Papermania set.  The snowflake borders are made using a Martha Stewart punch.  I die cut the sentiment using a Sizzix die and added some gems and ribbon as a finishing touch.

Thanks for looking.

Saturday, 23 October 2010

Bah Humbug - Elegance

This week's challenge over at Bah Humbug is "Elegance".

Although I have already used the "Peace" stamp from Clarity Stamps I hadn't had a chance to use the Noel Stamp I got in the same order.  So - elegance - I suppose it is up to each person to decide what is elegant to them but I hope I have achieved it in this card.  I started off stamping the word with Versamark onto white card and embossing in silver.  From a sheet of handmade paper in my stash I then cut out four ovals that would fit inside the O of Noel.  I then folded them in half and stuck each half to the next one to make a sort of paper bauble effect.  This was then stuck on top of the letter.

The image was then inked in silver and mounted onto silver mirri with each edge notched with a SU punch.  The remainder of the handmade paper was matted onto silver mirri and placed on a square white card blank.  A strip of silver ribbon was placed near the bottom of the card with a white organza bow placed on top.  With some scraps of the handmade paper I punched out some flower shapes which I used with some Prima flowers.  Finishing touches were some gems.

Thanks for stopping by.

Tuesday, 19 October 2010

Vellum & Christmas Humour

As we're still really busy decorating, moving furniture etc etc I have incorporated two challenges into my card.  Over at Bah! Humbug! their challenge is to use vellum and at Die Cut Dreams theirs is for Christmas humour.

I don't have many humorous Christmas stamps so decided to use my digistamp "Mistletoe Kisses" from Prairie Fairy as she just makes me giggle every time I look at her.  She's coloured in ProMarkers and I have added Diamond Glaze to her glasses, white Flower Soft for her bobble and edges of the jacket, Glamour Dust on the edge of her hat and pearls for the mistletoe berries.

I then used my nesties but as she was larger than the size I wanted to use I placed the nestie over the image and marked where she overlapped the die and then cut that piece out by hand and when I put the die over the image prior to cutting I made sure the handcut piece was over the top of the die so it didn't get cut.  I then trimmed this down so I could mount it on gold mirri cut with the same size die which was then mounted on red mirri.  The backing paper is from Papermania Classic Christmas.  The vellum is from my stash and I'm not sure if you can see but it has white Christmas sentiments printed on it - this was torn and the edge inked in red.  The tickets are a digistamp from Cuddly Buddly and were printed out onto cream card and inked.  The ribbon and gems are from my stash.

Thanks for stopping by.

Saturday, 16 October 2010

Club Night - Shoebox Challenge

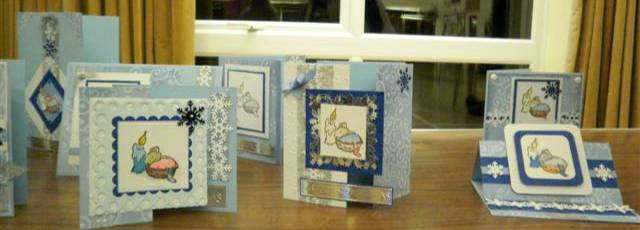
We had our club night last night and one of the projects was a "shoebox challenge" where we give the girls bags of exactly the same items and they have to make up a card using some of everything in the bag but can also add any embellishments, colours, glitters etc of their own.  We are always amazed at how different the cards turn out.  These are just a few of them.

Thanks for looking.


Wednesday, 13 October 2010

Cuties & a Recipe

Well I've been slaving over a hot sewing machine for the last few days so not much time to craft at all........ definitely getting withdrawal symptoms!!!  lol 

As I've been a bit pushed for time and I also have things to do for our monthly craft club on Friday I decided to make one card fit two challenges.  Over at Bah Humbug their challenge is "cuties" and over at Die Cut Dreams their challenge was a recipe of using 3 papers, 2 embelli's and 1 hand coloured image.  I have used a LOTV stamp and coloured using ProMarkers.  Her wings and the berries in her hair are Stickles.  All the papers came from the My Mind's Eye Christmas Glitter Book.  I've used nesties to die cut the image and two of the papers and then inked the edges.  The sentiment is computer generated and I've added a ribbon and a flower as the embellishments.

Thanks for stopping by.

Thursday, 7 October 2010

Glitter, Ribbon & pins

Die Cut Dream's challenge this week is glitter, ribbon and pins.

I started off using a new stamp I bought at Exeter the other week - it's called NO-EL by Hobby Art and I loved the polar bears and penguins on it.  Stamped with Memento and coloured using ProMarkers.  I then took some double sided adhesive sheet, cut to size, placed over the image.  I then took the top layer off and sprinkled with Glamour Dust.  I then layered onto black and red mirri card.  The card base is a DL covered in paper from my PM Classic Christmas set.  I punched the long edge using Martha Stewart's raindrop edge punch (which I thought looked a little bit like Christmas lights) and added some red card underneath.  A piece of red card and the patterned paper were placed underneath the main image.  I used some red and white dotty ribbon and then punched out some flower layers from red and black card using SU punches and used a pin from Posh Pins & Charms to attach them.  The pin started off with black beads and a pearl inbetween but as I wanted red I thought I'd try colouring it with ProMarkers and it worked brilliantly.  The sentiment is computer generated (I could just imagine the polar bear on the right of the image saying this in a very gruff voice!!!  lol) and matted using SU punches.  The last thing I did was to put a strip of red liner tape down the right hand side of the card and sprinkle it with Glamour Dust.

Thanks for dropping by.

Wednesday, 6 October 2010

Trinitage

Over at Bah Humbug the challenge this week is "Across the Miles".

I have got some Trinitage sheets by La Pashe which I bought from Imag-e-nation a while ago.  They are called Trinitage as apart from the decoupage on the front of the card there are three distinct layers inside the card - so a "Trinity of Decoupage" became Trinitage.

I cut a 14cmx14cm card and covered the front with paper from PM Contemporary Christmas paper pack.  The smaller decoupage was matted and layered onto the front of the card with some ribbon and punched snowflakes.  The sentiment was computer generated and layered using SU punches.

The larger images go inside the card with some card "spacers" inbetween to allow it to stand up and also fold flat.  Some more of the PM paper was put on the base and I added the sentiment which comes on the Trinitage sheet and added some more mirri snowflakes.

Thanks for stopping by.


Monday, 4 October 2010

Another 40th wedding anniversary and glass fusing

Well I think we have just been to the last 40th wedding anniversary celebrations for this year.  This time it was my sister Val and her husband Jim's 40th.

I made them a Bookatrix card using Serif Digital Scrapbook Artist for the images on the front of the card.


After my great summer school doing stained glass I went for another day with the same tutor at his studio as I wanted to try fusing glass.  This was to be the present for Val & Jim and I ended up making them a large fluted bowl and two matching candlestick holders.  It was great fun and I think I will certainly be doing more glass work - also it makes a really unique present.


Talking about the stained glass summer school here is a photo of the main piece I made.  It's an art deco tree of life lamp.

Thanks for looking.