Followers

Thursday, 21 November 2013

Catching up..............

Hello all - no I've not disappeared but have been slaving away over a hot craft desk making "stuff" for a big Christmas Fair on the 30th and my list seems to be getting longer and the time shorter!!!  lol

Just thought I'd share with you some paperweights I've made to sell at the fair.  I actually got the paperweight blanks last week and thought they would make nice Christmas presents.  Luckily I had some nice sticky backed velvet to seal the underneath and the right size boxes to fit them into.

Here they are:


Oh, there are also some brooches and a pair of earrings that I made as well.  Hope it's going to be a busy fair otherwise I'm going to have to find a home for all this stuff!!!  lol  I also found a greyboard cupcake stand that I covered and assembled as I thought it would show off these paperweights nicely.

Don't forget to pop back on Saturday for our new challenge over at Addicted to CAS.

Happy crafting.


Saturday, 16 November 2013

Christmas Shoe Box challenge

Hello everyone - a very quick post from me today as I've been out all day at a workshop.  On Wednesday we had our normal Crafty Bunch club night and we gave the girls a Christmas Shoe Box - which isn't a box but a pack of various Christmas items.  The girls had to use every element we gave them but could add to it with their own stash.  It never fails to amaze us how you can get so many different cards from the same ingredients.  Here are a couple of photos to show you the results.


Hope you're all having a great weekend.

Happy crafting.


Saturday, 9 November 2013

Addicted to CAS - Challenge #26 and Anniversary Celebrations!

Happy Saturday everyone - we're back round to a new challenge at Addicted to CAS and I can hardly believe it but this challenge marks our 1st Anniversary!  So we are celebrating in a big way!!!  It's been such fun being on the DT over the year and we've had some amazing entries for our challenges, so hope you've had fun as well.  Thanks must go to our esteemed leader Kylie for all her hard work.

Today's challenge is being hosted by the inimitable and hugely talented Marie.  Here is what she's chosen for you:

Our Sponsor is:

Deedee will offer 3 digi sets for our winners.

We have added a Guest Designer Feature for ATCAS!  We are so excited to announce that Bonnie Klass (Stamping with Klass) will be our first Guest Designer for the month of November.  Welcome Bonnie!!

Bonnie is an amazing card artist and we know you will enjoy her lovely creations as much as we do.  Here's a little about Bonnie:


"Wow, I’m so excited to be a Guest Designer at Addicted to CAS.  CAS is my favorite style of cards to make and I’m happiest and sanest when I’m making cards!
My husband and I have been married over 40 years and we have 3 beautiful grown daughters who have brought 3 special sons-in-law and 5 grandchildren into our lives.  We take care of 2 of our grandsons during the week.  They keep us hopping!   I snatch any free moments I can to get inky!
I discovered card making about 6 years ago and that has become my passion. (Some would say obsession.)  I started blogging about 4 years ago and I have learned so much and made many wonderful friends through the blogging community.  There’s so much inspiration and camaraderie on these creative blogs.  Stampers are the best people!"
~~~~~~~~~~~~~~~~~~~~~~~~~~~~~~~~~~

For this challenge we are giving away a bumper prize pack to our CAS Perfectionist!!
Marie, Loll, Kylie and myself have offered prizes on top of our sponsor's prize.
Here are the prizes -
Marie's prize is:
Siligum silicone modeling paste which is a really easy and fun way to make your own moulds which can be used to make embellishments from clay or UTEE etc.
Loll's prizes are:
two packs of Loll's card candy!!!
and
$20 voucher at Nicecrane Designs

Kylie's prize is:

$10 gift voucher to Inspired by Stamping 
 
Karen's prizes are:


A sheet of Joanna Sheen's stamps "Rudolph & Santa Christmas Collection" and 
a Stampendous cling stamp "Birdie Kiddo"

So, after all that excitement it's onto my card.  I've actually used a digi stamp set from Deedee's Digis called Now and Forever and I've played with three elements and a sentiment using my CraftArtist programme.  As soon as I saw the entwined wedding rings it reminded me of when people used to pull hand knitted baby shawl's through a wedding ring to determine how fine it was..............do you remember that?  Anyway that's what gave me the idea of the rings being the main focal point and that you can see behind the wedding cake and church.


I die cut a square piece of card using my Tonic Ribbon Wreath die set so I had an aperture to view the image through.  I added Diamond Glaze to the rings and the smaller die cut from the same Tonic set.

Please pop over to Addicted to CAS to see the fabulous cards the DT have made to inspire you.

Whatever you're doing have a great weekend and looking forward to seeing your great creations and we can't wait to give away all these amazing prizes to our CAS Perfectionist.  Good luck everyone.


Wednesday, 6 November 2013

Hubby's birthday card

Hello all - just thought I'd share this card I've just made for my DH's birthday on Saturday.


I've used my Stampin Up Wetlands set which is NBUS (never before used schtuff!!!) that I bought at our SU Extravaganza a couple of weeks ago.  I've stamped the main image on some white card and then masked the bird whilst I sponged on the sky, water and ground.  I've added some reeds and used one of the smaller stamps of birds wading.  I die cut the image using my Spellbinders Majestic Elements dies, then die cut the same out of contrasting card which was then put through my eBosser with a wicker e/f.  I matted this onto the blue card and then added the main image (popped up for dimension) so you can see the blue through the swirly edges of the image.  The greeting is from the same set stamped onto die cuts from the Majestic Elements set.  I've added a ribbon and some Liquid Pearls to complete the card.

Thanks for dropping by.  It's a very dismal day here but very mild...........in fact we had the last of the runner beans out of our garden last night - how mad is that for November!!! lol


Saturday, 2 November 2013

Less is More Week 144 Fireworks

Hello everyone

I haven't joined in the Less is More challenge for a couple of weeks due to lack of time but when I saw what it was this morning it was a bit like deja vu.  Here are the details:

We have a slightly different colour challenge for you.  We want to see how our photo inspires you and see cards that have ...
Dark background with a splash of colour(s)


I thought I'd use my black ribbed card again and made up a 5x7 card blank.  I stamped my Woodware Poinsettia Box in Versamark and embossed with gold e/p.  I used my Vintage Pearly Pallet from Imagination Crafts to colour the poinsettias and added some Liquid Pearls for the centres.


Very strange weather at the moment - we've had really warm sunshine earlier but then it got very windy and lashings of rain.........now it's changed back again!

Have a good weekend and happy crafting.


Tuesday, 29 October 2013

Exploring Velvet

Hi all - well, we weathered the storm okay here in Somerset with not too much damage at all and when you see some of the pictures in the paper and on the news we realise just how lucky we were.  Our thoughts go out to everyone who was affected by the "St Jude" storm.

 I have finally completed the project I started at my weekend workshop with the lovely and very talented Angie Hughes a few weeks ago.  Now this wasn't the easiest thing in the world to photograph with all the gilding etc but you'll get the picture (oops......sorry about that!!!).

Here is the photo that I posted originally:


and here's how it turned out:


I thoroughly enjoyed this workshop with Angie and hope our paths cross again.


Sunday, 27 October 2013

Let's Get Inky -Stamp A Happy Christmas!

Hi Everyone

Well, we've battened down the hatches and are waiting for this huge storm to come in at about midnight tonight...........fingers crossed it will miss us but it doesn't look like it!

My friend and fellow DT member Nonni at Kortikarku is organising two Christmas card challenges and the first one is being sponsored by STAMPlorations Stamps and they are giving away a free stamp set.  Here are the rules:

Let's Get Inky -Stamp A Happy Christmas! 
Let's create Christmas cards with stamping playing the main role! You could use fun techniques like masking and combine background stamps with smaller stamps... Or how about using non-Christmas stamps for Christmas and playing with some embossing powders? Or stamping with watercolors? Or tone on tone stamping maybe? The possibilities are endless... Let's get inky and creative! You can choose any style from CAS to vintage, what ever you like the best... You can use embellishments too -just don't cover up your fabulous stamping completely!

Thought I'd join in this challenge and here is my card:

I've started with an 8" Anna-Marie Designs pearl card and matted on some of her lovely gingham cardstock.  I cut a circle and sponged around the edges with Crushed Olive DI.  I've used Anna-Marie's Christmas Tree stamp set and stamped in both Crushed Olive and Forest Moss DI's.  I matted onto a Tonic Holly Wreath die and then onto a Spellbinders Grand Decorative Circles.  The little cross stitching on the gingham card is a stamp in the same set.  I've added ribbon, flowers and pins from my stash.  Not sure it shows but I've used Wink of Stella Clear on the trees and then added some very small diamante gems onto the dark tree.  Final touch was putting pearls in the corners.

Hope you're having a great Sunday whatever you're up to.  Thanks for stopping by.


Saturday, 26 October 2013

Addicted to CAS Challenge # 25

Hello everyone - can't believe it's time for another challenge at Addicted to CAS but it is and your hostess for this challenge is our esteemed (and very talented) leader Kylie.  The code word she has chosen is:


Sponsor


 Prize will be 5 images of the winners choice

Now I know one layer isn't everyone's favourite technique but here is my offering for you.


For this card I've made up a 5" square card blank from black ribbed cardstock.  I've stamped my Woodware JGS169 Christmas Date stamp using Versamark and embossed it in fine gold e/p.  I've coloured the number, leaves and berries using pearl paints and then added red Gloss Gel to give dimension to the berries.  You can really see the ribbed cardstock on the coloured numbers.

I decided to make a second card using a different method of using Versamark.


I took a card blank and embossed the two largest layers of my Spellbinders Labels Twenty-Eight.  I then took a sponge and used my lightest blue Pan Pastel to sponge the centre of the embossed area and between the two dies.  Next I put the bauble and bow stamps from Clearly Besotted's Signature Christmas Additions set and the sentiment  from their Holiday Sentiments set, inked up with Versamark ink and stamped into the central area.  I then took my sponge and put a darker blue Pan Pastel on it and sponged over the stamped image and suddenly it appears!  I'm not quite sure why the background colour appears blotchy but it doesn't IRL!!!
 
I've added some clear glitter glue to the centre of the bow and the stars on the bauble.  A very quick and simple card.  Don't forget to pop over to Addicted to CAS to see the amazing cards the DT have made for this challenge.

Have a great weekend.  Happy crafting.


Wednesday, 16 October 2013

Pearl Anniversary card

Hello everyone from a very windy and wet Somerset!  It was such a lovely day yesterday we were hoping for more of the same today.............!

I had a commission to make a Pearl Anniversary card and here it is:


I've used my Stampendous "At the Altar" for the main image and Gina K "Always and Forever" for the sentiment on the front of the card.  I used Grand square nesties for the layers and on the top one and die cut the Spellbinders Quatrefoil die.  The corners are Spellbinders Gold Elements One and the embossing folder is an 8" Embossalicious e/f.  Pearl swirl, flowers and pins from my stash.  I made an envelobox to hold the card and used the same e/f and dies on that with the addition of some Liquid Pearls.


Thanks for dropping by.  Hope your week is going well.  Looking forward to the weekend as we have a Stampin Up Extravaganza on Saturday that we've organised for the girls in our club and then off to the Taunton Sincerely Yours craft show on Sunday.  My sister Val is coming down for the very heavily laden crafting weekend! lol


Saturday, 12 October 2013

Addicted to CAS - Challenge #24

Hello everyone - welcome to the start of the weekend and our latest challenge over at Addicted to CAS.  This week's challenge is hosted by the super talented Christine and here is the code word she has chosen:

Our Sponsor for this challenge is:
and they are offering a $20 gift certificate to our CAS Perfectionist
www.nicecranedesigns.com
 
 
Since I've just received my order of the October release stamps and dies from Clearly Besotted (which I think I am!!!  lol) I decided to make good use of them.   I've made two cards and for the first I have used the Holiday Sentiments set.  
 
 
 I started cutting down a sheet of A4 acetate and scored to make a square card blank.  I cut a piece of white card and stamped the word "merry" twice and "Christmas" once using SU Baja Breeze ink.  I cut a mat slightly larger and pricked around the edge.  Using my StazoOn Cotton White ink I stamped some images directly onto the acetate.  I then attached the topper to the front of the acetate.  I cut a piece of silver card slightly larger than the mat of the topper and attached it to the inside back of the topper so you can't see any glue.  I then cut two pieces of white card the same size as the silver and placed it behind the topper on the inside to be used for your sentiment, and then placed the other piece on the back.  A ribbon finished off the card.

For the second card I used the Set the Scene stamp and die set.  


I started off die cutting the globe aperture from a piece of card.  I then put this through my Ebosser in a snowflake e/f.  I placed acetate behind the aperture and then used the positive piece of the globe to stamp my scene.  I added some snow and glitter (which I don't think showed up in the photo).  The sentiment was cut using an EK label punch and I added some liquid pearls to the centre of the snowflakes.  This was all popped up using d/s foam onto the base card.

Please don't forget to pop on over to the Addicted to CAS blog to see the amazing cards the DT have done to inspire you.

Have a great weekend.


Friday, 11 October 2013

Less is More - White on White

Well here we are at the end of the week already.  I've just been outside picking my crab apples to make some jelly with but this year is a bumper crop and I have got a huge amount - far too many for me, so will be looking for someone who wants some!!!

I was just sorting out my Christmas dies and embossing folders and came across one folder and had a light bulb moment.............this week the Less is More challenge is:
 
White Christmas
For our challenge this week, we have chosen to add another parameter to our colour challenge and that is that the submissions must be Christmas related cards.
The colour is 
WHITE on WHITE
We would like to remind everyone that submissions must adhere to the Guidelines set out above and be evidently Clean and Simple!
It's also a new month which means a new sponsor and this month we are excited that Stephanie from Clearly Besotted is our sponsor.  Clearly Besotted are Celebrating their first birthday this month too!
 
So here's what happened when I put my light bulb moment into practice:


I put a piece of Anna-Marie's pearl card through my Ebosser using a Crafts Too Poinsettia Frame and popped it up on an A6 tent fold card base.  I die cut a tag from my Spellbinders Fancy Tags 2 set and two lots of the Poppystamps Small Blooming Poinsettia (this is a really handy die especially if you use it with their Blooming Poinsettia set).  The sentiment, also cut from the pearl card, is from a Tattered Lace Christmas sentiments die set.  To finish off I've added some Liquid Pearls et voila!!!  lol

Thanks for visiting, I love reading all your comments.  Don't forget to visit tomorrow when we will be unveiling the new challenge at Addicted to CAS.


Saturday, 5 October 2013

Two days - two Less is More challenges!

Happy Saturday all - well it's a beautiful day here in sunny Somerset - blue skies, wispy clouds and SUNSHINE!!!  Hope it's as nice wherever you are too.

After my very late entry yesterday into last week's Less is More sketch challenge I thought I'd surprise everyone by entering their new one on the very first day!  This week the Less is More challenge is:
 
White Christmas
For our challenge this week, we have chosen to add another parameter to our colour challenge and that is that the submissions must be Christmas related cards.
The colour is 
WHITE on WHITE
We would like to remind everyone that submissions must adhere to the Guidelines set out above and be evidently Clean and Simple!

It's also a new month which means a new sponsor and this month we are excited that Stephanie from Clearly Besotted is our sponsor.  Clearly Besotted are Celebrating their first birthday this month too!


I knew immediately what I wanted to do for this theme and here it is..........


It's really difficult photographing a white on white card but hopefully you get the gist!  I have used my Heartfelt Creations Poinsettia stamp set and white embossed it onto vellum (still out from yesterday......)and then die cut it using the Heartfelt Creations Sunkissed Fleur die which matches up perfectly with the Poinsettia stamp set as well - doesn't it make a pleasant change to have one die for two stamp sets?  I attached a piece of white ribbon across a 6" square blank and then shaped the flowers and leaves with a bone folder before adding them to the card using Pinflair Glue gel.  The sentiment, Wishing you a Magical Christmas, was also white embossed on vellum and is from my Woodware "Beary" Christmas set and I used my EK Success label punch and also cut a piece of white card to back it.  Rather than trying to glue the vellum to the white card I thought I'd use brads but didn't have any white ones (who does?) so covered the tops in Versamark ink, then white e/p and heat embossed them.  Finishing touch was adding some white Liquid Pearls.

Just wanted to wish Clearly Besotted's Stephanie and all her amazing DT girls a very, very Happy Birthday.

Thanks for dropping by.  Hope you all have a wonderful weekend.


Friday, 4 October 2013

Less is More - Week 139 Sketch #10

Hello All - well it's Friday afternoon and I've just managed to get my entry done for the Less is More challenge - cutting it fine eh?

This week's challenge has been set by Jen and it's a sketch:


For my card I've used a combination of my Tonic Decorative Wreath Rings Verso die set, my new Dee's Distinctively Bell Floral Collection dies and Clearly Besotted's Basic Banners stamp and die set.


I've cut the flowers out of two coloured vellum and the leaves out of green cardstock.  I then ran a piece of white card through my Ebosser using the outer ring and next sized decorative die so I could use the main card with the aperture popped up over the decorative die cut card which had another piece of vellum behind it.  The sentiment was stamped using DI Dusty Concorde and I sponged around the decorative die cut using DI Spun Sugar.  All the corners were rounded using my Corner Chomper.

Thanks for dropping by.  Hope you all have a great weekend.

Tuesday, 1 October 2013

Catching up.........

Hello Everyone

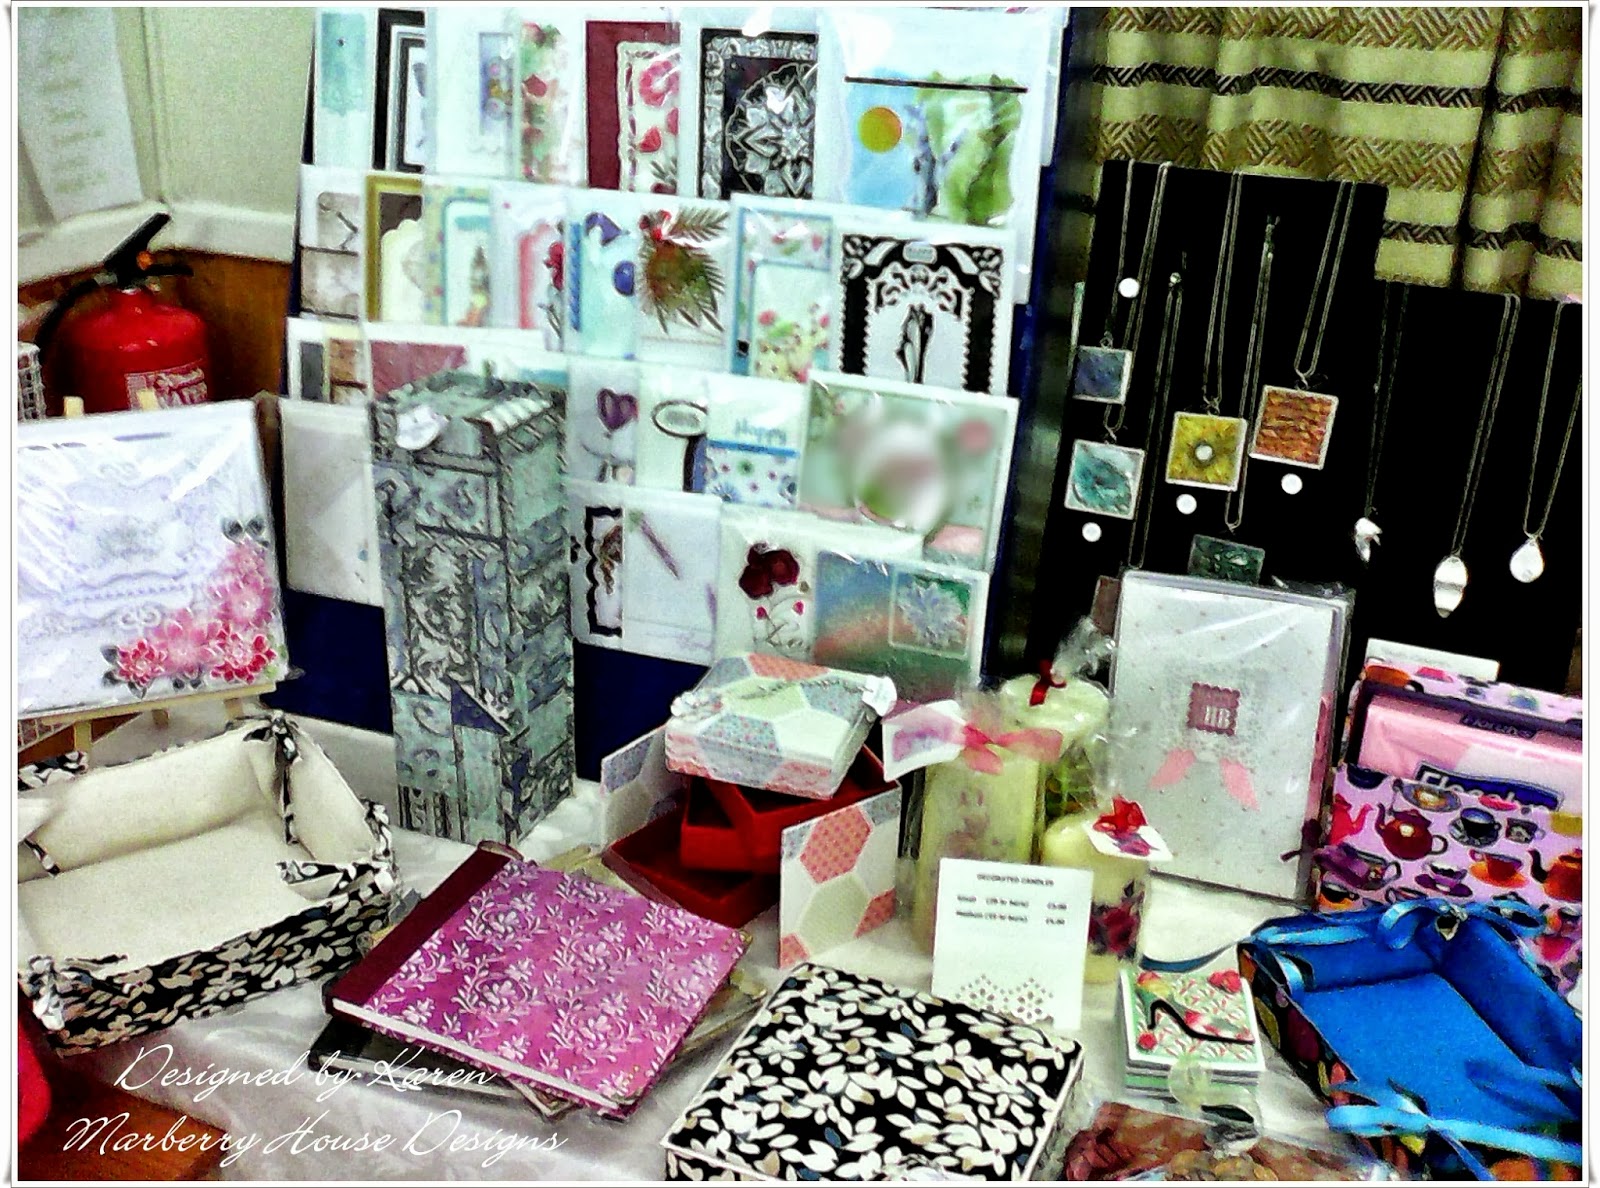
Just a short post to catch up with what's been going on over the last few days.  I spent most of last week preparing for my table at the Macmillan Coffee Morning on Friday.  It was absolutely hectic - so many people came to support the cause which was wonderful.  Here's a photo of half my table (I had asked for two tables but there wasn't enough room, so couldn't display everything I had).


Got back from the event, unpacked everything and sort of put it all away (how come it all comes out of drawers and spaces but when you try to put it all back it doesn't fit?????  lol).  I then had to get all my gear ready for the two day workshop with the amazing Angie Hughes.  This is a photo of one of her pieces that inspired the workshop.


The theme was "Exploring Velvet" and we spent the first day playing with ink, dyes, stamps, foiling and generally getting down and messy!  It was brilliant.  The second day we made a start on the actual free machine embroidery part and the photo below is my work in progress.  It might look a little strange at the moment as a layer of black organza has been put over the top of the work to stitch through.  If you didn't do this the actual stitches would sink and disappear into the cotton velvet itself.  When I've finished all my stitching I shall cut away all the excess organza and then blast it with a heat gun to seal the cut edges.  Hopefully I will be back in a few days to show you the finished piece.


Thanks for dropping by.